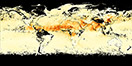


![Average Land Surface Temperature [Day]](/images/datasets/132x66/MOD_LSTD_CLIM_M.jpg)
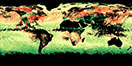
![Average Land Surface Temperature [Night]](/images/datasets/132x66/MOD_LSTN_CLIM_M.jpg)
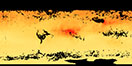
![Land Surface Temperature Anomaly [Day]](/images/datasets/132x66/MOD_LSTAD_M.jpg)
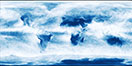
![Land Surface Temperature Anomaly [Night]](/images/datasets/132x66/MOD_LSTAN_M.jpg)
![Land Surface Temperature [Day]](/images/datasets/132x66/MOD_LSTD_M.jpg)
![Land Surface Temperature [Night]](/images/datasets/132x66/MOD_LSTN_M.jpg)


NEO News
NEO Analysis User Guide
August 9th, 2017 by Kevin Ward
Overview
The Image Composite Explorer (ICE) was developed as a tool to let people explore satellite image data. ICE is a developmental “on ramp” to the world of Earth system science. It is designed to demonstrate how scientists use multi-spectral data to examine our world. Within its intended purpose, ICE is flexible and can be easily configured to teach various lessons using simple HTML parameters.
Interface
The ICE interface provides three thumbnail images in a row across the top, and a larger window beneath that displays a larger version of the image that the user has selected. A label appears above the thumbnails to indicate what wavelength or measurement (sometimes referred to as a data product) is currently shown in each. In the large display window, users may probe or interact with the image in various ways.

The Image Composite Editor (ICE) simultaneously displays thumbnails of up to three datasets. They can be different types of data over the same area, the same data types over the same area for different time periods, or different wavelengths from a multi-spectral remote sensing image. In addition, the main window displays one large image, which can be a color-coded image, a representation of a mathematical operation applied on the data sets, or a color combination of different wavelengths.
Note the column of buttons to the right of the display windows.
Step
Hitting the Step button (righthand side) will cycle through each of the three thumbnail images in the larger display window.
Probe
Press the Probe button and then pass your cursor over the large window. You will see a display of the unit values for each of the three thumbnail scenes as well as the latitude and longitude location of each pixel.
Zoom & Roam
Push the Zoom & Roam radio button if you want to increase the size of the image in the large window. Zooming in is done by a left button click on your mouse; zooming out is a right click. Once you have zoomed in, you may click and hold then drag the image up or down or from side to side to roam around within the scene. (A radio button controls this mode and the “Select Region” mode because both functions require users to “click and drag” with their mouse — both cannot be “on” at the same time.)
Restore
The Restore button returns the image in the large window to its original state (e.g., zooms out all the way).
Plot Transect
Choosing the Plot Transect radio button enables users to draw a line segment across any part of the scene in the large window. A new window will appear graphing the unit values for each of the three parameters shown in the thumbnails along X- and Y-axes. Note that while this window is active, users may continually “click and drag” to redraw the transect line. Moving the transect line without releasing the mouse button provides another interesting way to probe the data (i.e., watch as the unit values shift in real time as you move your line around in the window).
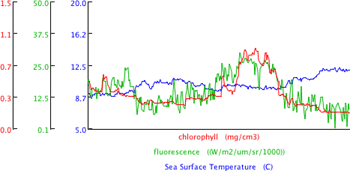
The Transect function simultaneously displays the values of each type of data (chlorophyll, fluorescence, and sea surface temperature, for example) for each pixel along a line chosen by the user.
Select Region and Outline Region
Choosing the Select Region radio button enables users to draw a box around a region of interest by “dragging” the mouse pointer (holding left button while moving the cursor). As Mother Nature rarely works at right angles, the Outline Region button enables users to more precisely trace the contours of some portion of the scene. Once a region is selected by either of these two means, a number of diagrams can be produced in a second window to help users analyze the data. For those diagrams (like a scatter plot) that need two sets of data, users may select which two parameters they wish to compare by clicking on their thumbnails; otherwise, the first two windows will be selected automatically. A yellow frame appears around the thumbnails selected.
Scatter Ploy
A scatter plot is a graphical comparison of the measures of two or more different things that can change over time and space, called variables. Scatter plots provide a useful way to look for relationships between different variables and can reveal how much one variable, as it changes, affects another. The relationship between two variables as they change is their correlation. We can show the correlation of two changing variables graphically by plotting their measurements along horizontal (X-axis) and vertical (Y-axis) axes. The closer the data points come to making a straight line, the better the correlation. For example, try comparing the number of hours you study for each exam this year to the numerical grade you receive for each exam. If you plot those numbers on a graph, you will probably find a good correlation between them. If the data points appear to cluster along a line that is rising from left to right, then there is a positive correlation between the number of hours you study and the grade you receive. In other words, a positive correlation means when the value of one variable goes up, the other variable goes up too. There can also be negative correlations between variables, as indicated when data points appear to cluster along a line that is moving downward from left to right. If you sell lemonade on a street corner and every day you incrementally raise the price of a cup of your lemonade, over time you will notice that the more money you charge, the fewer cups of lemonade you sell. Plotting these data points would reveal a negative correlation. A negative correlation means that as one variable goes up, the other variable goes down.
Within the context of ICE, users can look for correlations among satellite remote sensing measurements of the Earth’s environment. Click on the two thumbnails you wish to compare. Click either Select Region or Outline Region to specify where in the scene you wish to look for a relationship. Then click Scatter; or you may click 3D Scatter to compare all three thumbnails. A new window will appear containing the scatter plot of the area you selected. The more positively correlated the images, the more closely the data points will cluster around a 45-degree angle line moving upward from left to right between the X-axis and Y-axis. High negative correlations will show up as clusters of points along a 45-degree angle line moving downward from left to right. Conversely, the less correlated the images are, the more the data points will appear randomly scattered on the graph. Such images may be only weakly correlated or they may have no correlation at all.
You may click and drag on the scatter plot to enlarge it. Clicking “Reset” will restore graph to its original size.
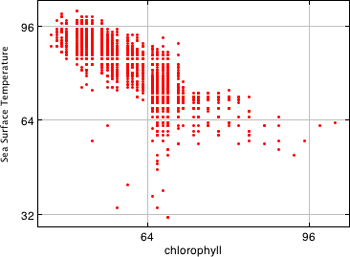
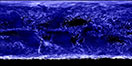
The scatter plot shows the relationship between two datasets over an area. Each point on the plot shows how two things that vary (or “variables,” in this case sea surface temperature and chlorophyll) at one or more pixel locations are related. Pixels with high sea surface temperature values have lower chlorophyll values, and vice-versa. Although there is some scatter among the points in this example, notice that the general trend follows a line that is falling from the upper left to bottom right — typical of a negative correlation.
Histogram
A histogram is a bar graph that shows the frequency of occurrence of specific values for a given measurement. If you flipped a coin 100 times and recorded the number of times it landed on heads and the number of times it landed on tails, you could plot those numbers on a bar graph. That would be a simple histogram plot showing the frequency of heads versus tails. Now suppose you rolled a six-sided die 1,000 times and recorded the number of times each number, 1 through 6, came up. If the die was “normal,” you would expect each number to come up roughly an equal number of times. But if the die was “loaded,” and you rolled a “6” ten times more often than any other number, then your histogram would reflect a disproportionate weighting for the number 6 in the bar chart.
Within the context of ICE, a histogram is a count of the pixels within a selected region at each of the image’s 256 shades of gray. Selecting a region and then clicking the Histogram button brings up a window that graphically displays the number of pixels for each shade of gray within the selected region. Histograms are useful for a variety of reasons. For example, a histogram allows users to estimate how large an area is contained within a certain feature of a scene (for example, a cloud, a burn scar, or a phytoplankton bloom). If you know the spatial resolution (per pixel) of the image and the number of pixels at a given shade within the selected region, then you can estimate the physical size of the feature (in two dimensions, of course).
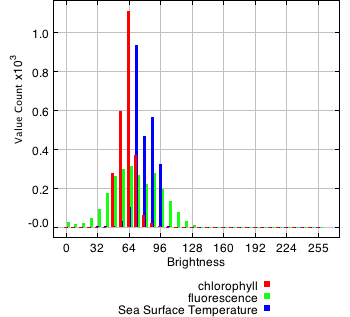
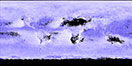
The histogram shows the number of pixels that have a particular gray scale value for each of the three data sets (represented by different colors). For example there are approximately 1150 pixels with a chlorophyll value of 64 in this histogram.
Comments Off on NEO Analysis User Guide
- Browse by Topic
- Analysis
- NEO in the Media
- New Datasets
- Services
- Uncategorized
- Browse by Date
- August 2024
- May 2023
- April 2021
- February 2021
- December 2020
- November 2020
- October 2020
- September 2020
- June 2019
- March 2019
- April 2015
- April 2014
- December 2013
- November 2013
- August 2013
- March 2013
- June 2012
- June 2011
- April 2011
- November 2010
- August 2010
- February 2009
- May 2008
- April 2007